Category Archives: education

Worms & Margaritas

What is better than enjoying Happy Hour sipping made-from-scratch margaritas with my friend and fellow gardener Mrs. R? Enjoying Happy Hour, sipping made-from-scratch margaritas with Mrs. R while sorting her vermicompost bin!

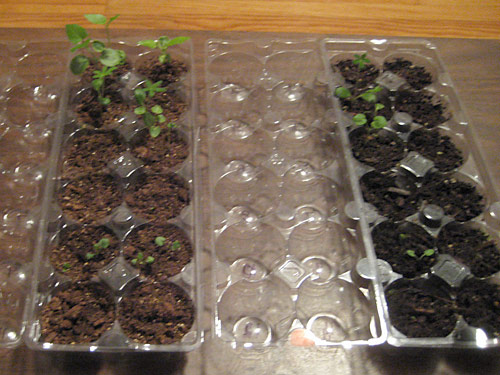
Just this past January, the Other Half had lovingly purchased and constructed a vermicompost bin for our home. We moved Jim into his new home, and he has since been happily devouring our garbage. However, we are probably another six months out until we will need to sort the bin. That’s why I was so stinking excited I couldn’t stand it when I drove over to help Mrs. R yesterday.

First the bin was hauled up out of the basement, into the garage, and the contents were dumped onto a tarp. The contents of the bin had the smell of fresh, rich soil.

Vermicompost Bin Contents

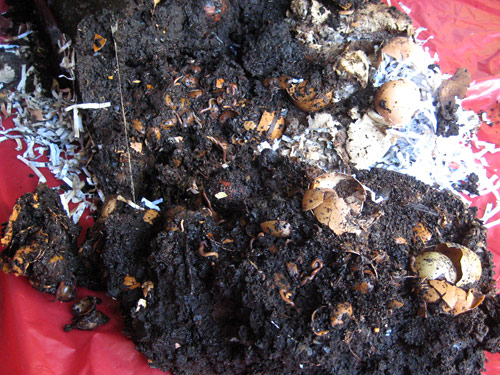
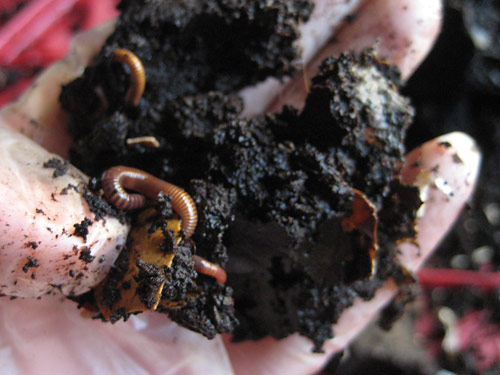
We then both pulled on some gloves and began sorting the contents of the bin. The castings (worm manure) were set aside for use in the garden. The worms along with the majority of the intact compost and remaining bedding were placed back in the bin. It was fun to discover nests of worms in the hollow of an eggshell or an avocado pit. There seemed to be a good variety of worm generations active in the bin.

Compost Worms

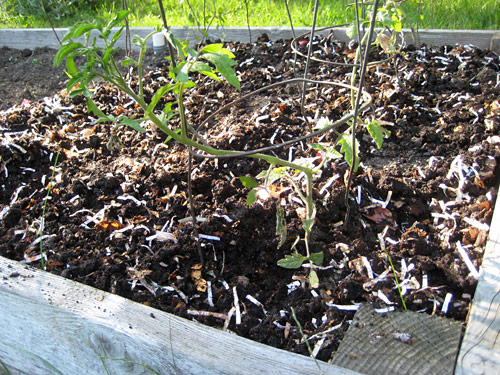
Finally, when all the worms were tucked safely away back in their bin, we hauled the tarp of castings out to the garden beds. Mrs. R chose to use the worm manure to top dress one of their raised beds.

Worm Castings in Garden

As we were sorting the bin, chatting, and enjoying our cocktails, I kept thinking “This is such an inexpensive and near effortless way to reduce waste and get amazing nutrients for the garden. Plus, its fascinating. Why doesn’t everyone do this!?”

Hardening Off – The Experiment Continues

Back in March, the gardening itch overtook me and I decided to take another shot at starting seeds early indoors for spring transplanting outdoors. Last season’s attempt at starting seeds went okay until I moved the plants into the Lot. They all promptly died. This was my introduction to “hardening off.”

First Things First

At the beginning of this experiment, I wanted to see what the difference results were between potting soil and seed starting mix. Throughout their growth, both sets of seedlings had the same light, water, and temperature. The plants had an easier time with the seed starting mix. Here is a shot from April 11th when I transplanted some of the seedlings into larger pots. The seed starting mix is on the left and the potting soil is on the right.

Seedling Tray

Weaklings!

Hardening off is the process by which a gardener gradually transitions an early-start seedling from the cozy indoors to the wild outdoors. When seeds are started indoors, the environment is controlled in as many ways as possible. Water, light, temperature, and wind (the absence off) is regulated. The plant itself is fragile and not yet as strong as it will be outside in the garden. Here are some of the same seedlings as above ready to start the adventure.

Grown Seedlings

It’s All About Gradual Acclimation

After surfing around The Internets, I found a handful of university sites that gave tips on how to harden off plants. Here is what I found to be the general consensus:

  1. Set seedlings outside in a somewhat shaded, protected (from the wind) area for an hour or two. Bring back in afterward.
  2. Each day, over a period of about 7-10 days, increase exposure to sun and outside elements by an hour.
  3. Do not fertilize during this process.
  4. Sources vary on whether or not seedlings’ watering routine should be cut back as well.
  5. Once in the garden, the seedlings can receive a weak fertilizer solution to help ease transplant shock and get them growing again.

Sounds easy enough.

But Remember…

  • Watch out for low evening temperatures. If it is going to dip lower than the plant likes (it’s hardiness), simply cover it for the night.
  • When transplanting, pick an overcast day so the seedlings are not dealing with the new digs AND a bright sun at the same time.
  • As when planting any new member in the garden, let watering settle the soil around the plant instead of pressing hard and compacting the soil around the seedling’s roots.

These are all ideal conditions for the hardening off process. The plants will not instantly drop dead if the guidelines are not strictly followed. So, beginning this week, our seedlings will begin their journey to great outdoors that is the Lot.

The Darkside – Shade in the Garden

Some gardening friends and I recently attended a brief spring garden series. One evening focused on Shady Characters – Plants for Shady Areas presented by Kim Davidson, a local horticulturist. She did a great job covering what to consider when evaluating a shady area of the garden. There is not only the type of shade present at a given time during the day, but also soil moisture and soil fertility.

3 Shades of… Shade

Yes, there is more than one type of shade. Crazy; I know.

  • Light Shade: partially filtered sun with about 3-5 hours of direct sun (remembering afternoon sun is warmer than morning sun)
  • Moderate Shade: little direct sun as in under a shade tree canopy; light is usually reflected
  • Dense Shade: no direct sun as in under a conifer or on the north side of a home

If there is a shady area to plant, keep track of how the shade changes throughout the day. I learned this the hard way when planting an astilbe last season in what I believed was a shady area. In actuality, the area was blasted with about 4 hours of afternoon sun. “Sizzle” went the astilbe. “Whoops” went the gardener.

Soil Moisture

When choosing shade plants, also consider the soil moisture level of the shady area. Overhangs on homes or shade tree canopies will keep rainfall from the plants below. Trees and shrubs will compete with smaller plants for water. Plants tucked beside a fence or in a lower, shady area of the garden on the other hand may receive plenty of moisture.

Soil Fertility

Again, shade plants living in the shadow of trees and shrubs will find themselves competing for soil nutrients. According to an University of Minnesota article on shade gardening, “a spring application of a balanced fertilizer, followed by one or two applications as the season progresses” should help. Most shade plants enjoy soil rich in organic matter. Woodland wildflowers are a natural example of this as they thrive in the layers of decomposing leaves on the forest floor.

Plants for the Lot

The north side of the house has dense shade and is in dire need of something to soften the transition from lawn to foundation. The finch feeder hangs near that back window, so we’d like to camouflage the discarded thistle seed shells. I’ve plunked a few plants back there knowing they “like shade,” but now feel much more confident about what to seek out. Since there is an overhang on the house, plants which are able to grow in drier soil would be a good choice. Here are a few to try:

  • Epipmediums (Epipmedium): hardier varieties okay in dry soil; spider-like flowers with leaves that turn in the fall
  • Japanese Forest Grass (Hakonechloa macra): chartreuse in color to brighten shade area
  • Siberian Iris: move from another bed on the Lot?
  • Sweet Woodruff (Galium odoratum): white flowers and great scent